We often share our views and reviews for various software we come across and found important and/or worth talking about.
In the era of Information Technology, data is new wealth. In fact, data security and data recovery became the areas which affect almost everyone who interacts with the digital world. The technology used for storage devices has improved a lot. From the magnetic tapes and floppy discs we moved ahead to the era of CDs and DVDs and passing it, we are considering flash memory and other such options to store our data these days.
However, no matter which kind of technology we use, a device may malfunction. And even more importantly, we may accidentally delete some data which we later need! Data recovery tools play an important part in such a situation. In past we came across a software named “MiniTool Power Recovery” and shared our unbiased views and experiences working with it. Here is the quick link to the article.
Our readers have shown immense love to the article and it was one of the top articles at IndiBlogger also.
So, when we were approached by team MiniTool to inform about their other tools we were curious to explore them quite happily. From our team, I, mainly work on MacBook Pro. So this time, we thought to give a try to the “Mac version” of one such software by MiniTool.
Here I am sharing my personal experience with “MiniTool Mac Data Recovery 3.0” full version.
This Is Here In For You
Installation
You can download the free version of the software from:
After downloading you can simply double click the “.dmg” file (very similar to the .exe file for Windows OS) and the installation will begin.
The first step is to accept the End User Licence Agrement (or EULA), as in the most cases.
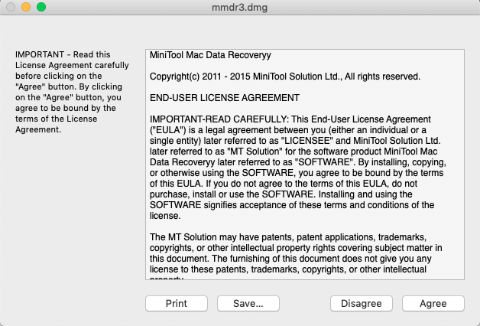
Mac Data Recovery – Installation – Step 1
Do we have any choice :)? Well, after reading and accepting their terms and conditions, you will find it installed. Mac users know that it will then ask you to copy/move the file to “Applications” folder.
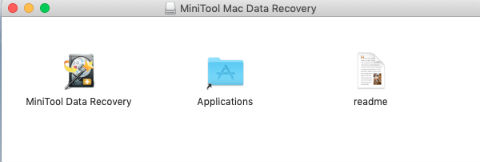
Mac Data Recovery: Installation Step 2
So you should proceed with it by dragging the file to the “Applications” folder.

Mac Data Recovery: Installation Step 3
Upon successful installation, it is available for you to use.
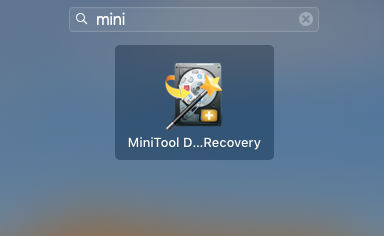
Mac Data Recovery: Installed And Available
And, now we can go ahead and use it.
Using It:
Upon your first attempt to run it, like any other Mac softwares, it will show you a warning that this application is downloaded from the Internet (and not Apple store), so use it with consent. I found it safe to use in my experience.

Warning
It will open quite user-friendly UI. Of course, one has to be a little technical to understand the options and what it actually does behind the scenes and get the maximum from it. A novice user, however, may not find it difficult to perform basic options.
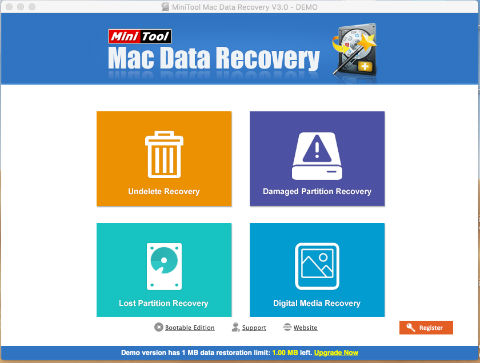
Dashboard
The dashboard shows you the options available to recover your files. But don’t miss paying attention to a message shown in white and yellow color in the status bar. The free version installed comes with a very important limitation. It allows you to recover maximum 1.0MB data using it!
You can, however, use this version to analyse the software and can even try with the actual device you want to recover data from, to check whether purchasing the full version will help you achieve your goal. Once you are satisfied with the results, you can go ahead and purchase the full version so the company will provide you the registration key. You can use it to upgrade from “free version” to “full version” (based on the license you’ve purchased).
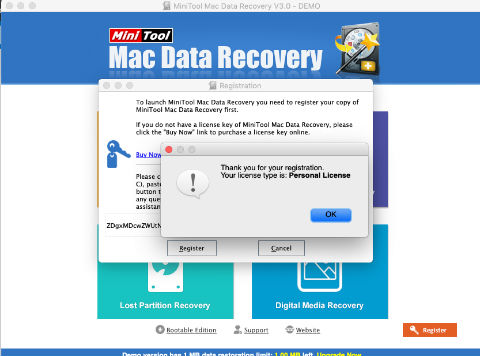
Upgraded To Full Version
You can also verify that the status bar is no more showing a warning.

Upgraded – Confirm.
Let’s Delete:
I’ve tested it by deleting some files from my USB Flash Disc (Pen Drive). Here are the files I am going to delete in the next step.

Files We Are Going To Delete
Upon deletion, these files are now gone to “Trash” (similar to “Recycle Bin” we have in Windows).
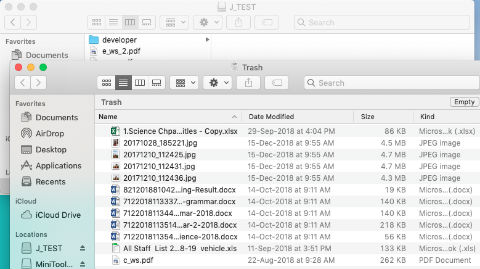
Files In Trash
This is the first and important layer of security provided by the OS itself to recover files deleted accidentally. We can safely recover these files from here. We, however, shouldn’t recover them right now. As we want to check it if they can be recovered using the recovery software we are testing, after permanent deletion, we should go ahead and clear the Trash.
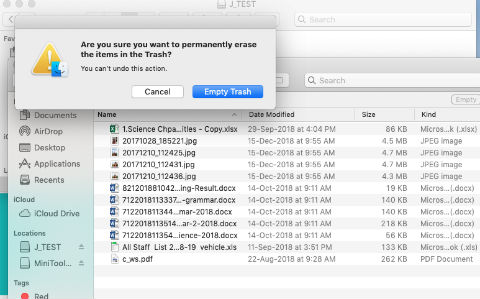
Let’s Clear The Trash
Upon confirmation, the files are removed from the Trash and it is empty now.

Trash Is Empty Now!
The actual challenge starts from here. Now the files are removed permanently, let us go ahead and check if “MiniTool Mac Data Recovery 3.0” is able to recover them back.
Quest To Recover:
To recover the files using this software, we have 4 major options available on its dashboard.
- Undelete Recovery
- Damaged Partition Recovery
- Lost Partition Recovery
- Digital Media Recovery
All the options are self-explanatory in a sense. And, the company has provided enough information for all of them on their official website. So, I am not repeating those details here.
Here is an official video by the software company which I think you should watch once before you start using the software.
Let us start checking “Undelete Recovery” option and see if it can show us the files we have deleted completely.
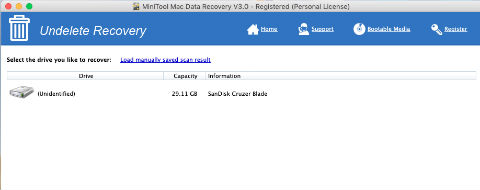
Check – Undelete Recovery – Option
Of course, selecting a drive/device is important. If you will try taking an action without selecting the same, it will suggest you doing so.
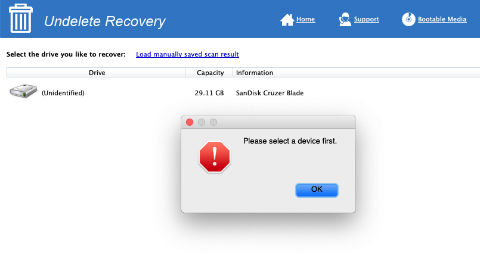
Undeleted Recovery – Step 2
The software considers the partition damaged, and suggests to go for other option. Possibly because the device is used between Windows and Mac OS environment quite frequently. The partition was also formatted in FAT32 and NTFS frequently.
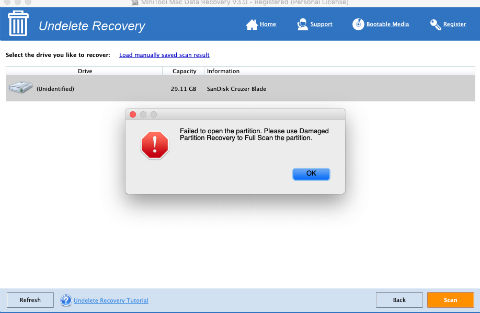
Undeleted Recovery – What It Says?
It also suggests checking through saved local results. Let us check them before we go ahead with other option.
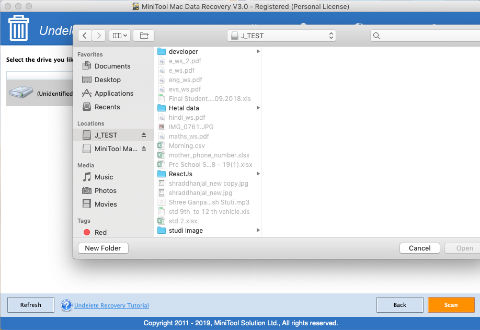
Exploring Saved Local Results – 1
While exploring this option we found the files we have deleted recently.
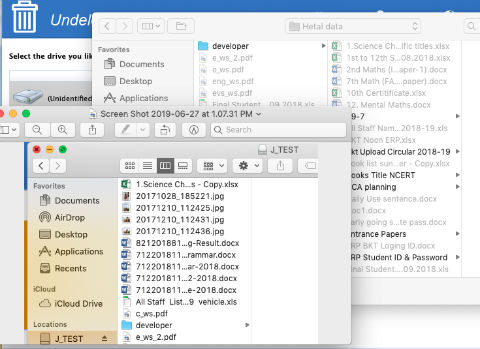
Exploring Saved Local Results – 2
However, we don’t see an easy way to recover those files. Actually, we cannot select the files to recover. The option looks promising for sure. But, for normal users, maybe it should be more user-friendly.
Let us explore “Damaged Partition Recovery” option as suggested by the software. The first step is to select the partition/drive/disc and go ahead.

Select the option and device
Damaged partition recovery option need much more time time to analyze and prepare files in a recoverable state. So while running this option, please make sure that your Macbook has enough battery power or the charger is plugged in. In case of the desktop system, make sure it is powered through a UPS.
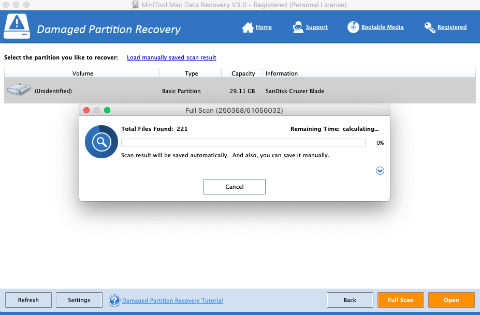
Start Analyzing And Recover – 1
It gives you a smooth UI where you can see progress of the process where you can shrink or expand the statistical details.
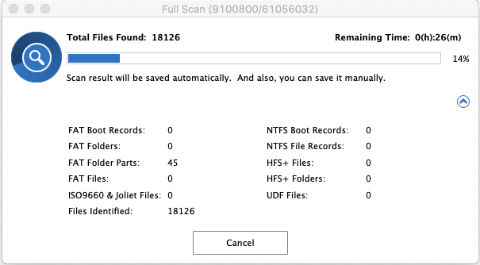
Start Analyzing And Recover – Progress
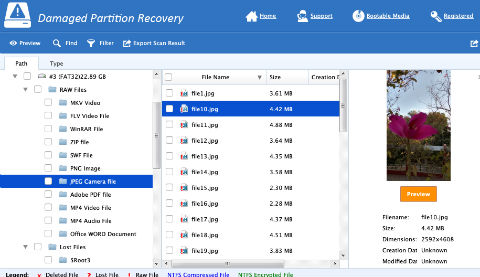
Upon complition it provides the results in a stardarad Windows Explorer like format. Here you can see various versions of the partitions. In each of them there are directory wise segments and file type wise segment.
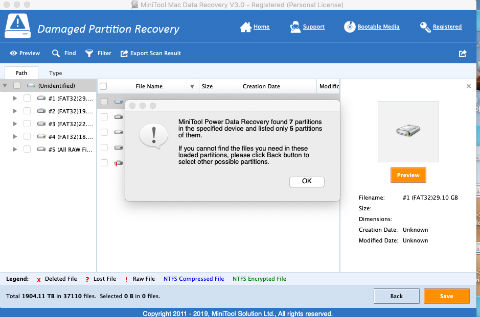
Start Analyzing And Recover – Results
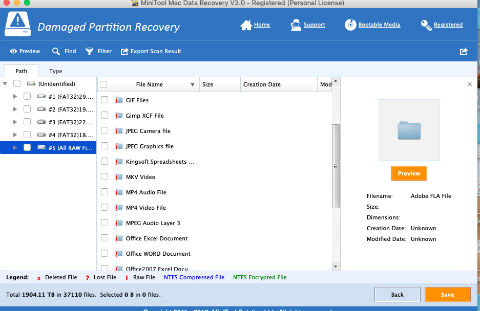
Exploring raw files through their type will be a difficult option. When exploring raw files, the file names are given in a sequential manner like “File1”, “File2”,… It is comparatively easy way rather than exploring the directory structure which require more time. However, as file names are not self explanatory you have to recover them and then see which file it is. You cannot determine them from name.
Damaged Partition Recovery – Exploring Results
I was able to recover all the files I have deleted for the testing purpose through this option. But to do that I had to recover many files and then had to go through them.
Damaged Partition Recovery – Where To Save?
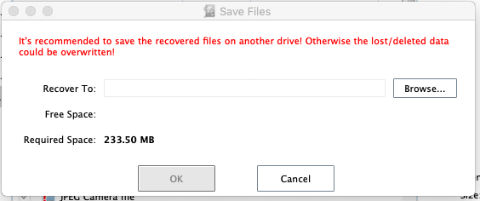
You can select the files to recover and then need to select a location where you want the software to store the recovered files. Ideally, the recovered files must be stored on a different device than from where they are being recovered. The software reminds the user about it and is definitely a good attribute.
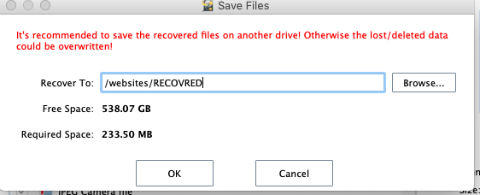
Damaged Partition Recovery – Specify Path.
Once you recover the file(s), you can check them in the Finder and then in the relevant software by opening them individually. The good thing is, the file recovery from the device doesn’t have any effect of this recovery process. The source device and all the data there remains as was until and unless you change anything there. It gives you the freedom to try various options for various number of times and find and recover your desired files if possible. Here are some screenshots which shows different stages of file recovery action.
The process is under progress.
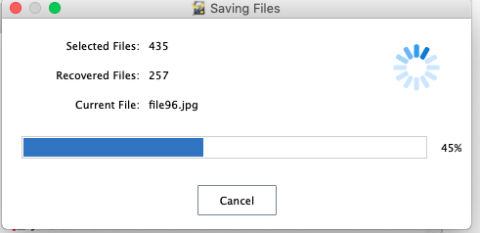
Damaged Partition Recovery – Progress Of Recovery
Now the recovery is completed.

Damaged Partition Recovery – Recovery Completed
Here are the files recovered.
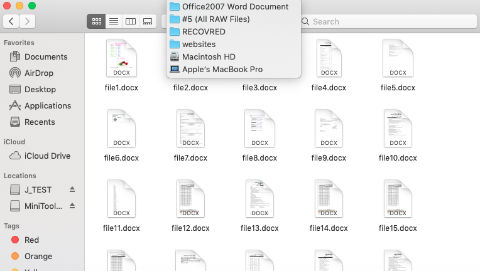
Damaged Partition Recovery – Recovered Files
As you have various versions of the partition available in the software, you can explore them. Images etc. can have an instant previous so you don’t need to recover them to confirm whether it is the right one which you were looking for.

Damaged Partition Recovery – Explore And Preview Other Versions
Go through various versions of parition table, check the files through previous where possible or recover them to a temporary folder in a different device, and mostly you will get what you are looking for.
Damaged Partition Recovery – Explore And Preview Other Versions
Overall, I am happy with the number of options provided for recovering deleted files by this software.
We found it quite easy to use and performing nicely when recovering (it is not grabbing all the resources during the process). We, however, haven’t tried with physically damaged disks so cannot comment on how it behaves when a specific sector of the file is corrupted. For the two scenarios we checked, we found it more than satisfactory.
Their marketing team is quite responsive and we hope the same for the technical team as well when you contact them in case of any need.
Have you used this tool? Let us know about your experience(s). Let us know in case you want to review any other data recovery tool for you.
The company name, software name and other registered and trademarked resources mentioned in this article belong to their respective owners.


